OCR Support in Office 365

Last year at Ignite, Microsoft announced OCR capability using “computer vision technology” would be coming to Office 365! This stirred up a lot of excitement as this was a feature many people have been wanting for years! Microsoft posted an article at techcommunity about the new advancement in Intelligent Search using OCR which can be found here. Well I am happy to say it exists and it sure is awesome!

Supported Types

Per the techcommunity article above, the supported types are “bmp”, “png”, “jpeg”, “jpg”, “gif”, “tif”, “tiff”, “raw”, and also “arw”, “cr2”, “crw”, “erf”, “mef”, “mrw”, “nef”, “nrw”, “orf”, “pef”, “rw2”, “rw1”, “sr2”.

To test this capability, I have uploaded a mock up design for a Help Desk Add-In I have built for Office 365 into a Document library.

SupportTicket

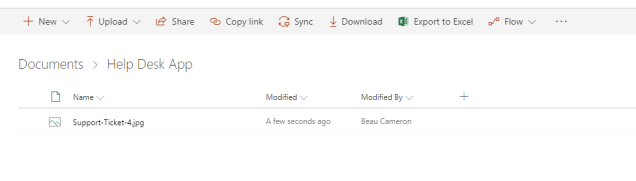
The jpg looks like this

HelpDesk

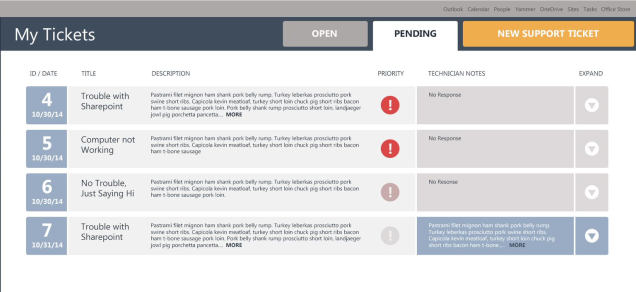
You’ll notice inside the image there are 4 tickets have been mocked up with a bit of bacon ipsum. The ticket titles are “Trouble with SharePoint”, “Computer not Working”, “No Trouble Just Saying Hi” and “Trouble with SharePoint” again.  My plan to test out OCR is to search for the contents of that Title using SharePoint search!

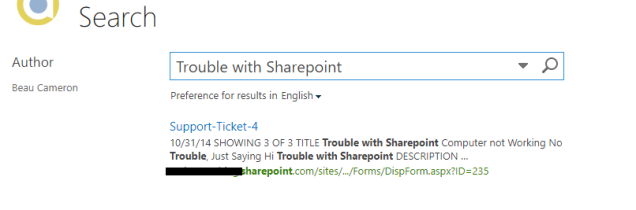
Test: Search for Ticket values

My first test will be trying to find one of the tickets labeled “Trouble with SharePoint” and look at the results! Not only does it match with the values in the image, but it’s also picking up the other ticket values as well.


SearchResult

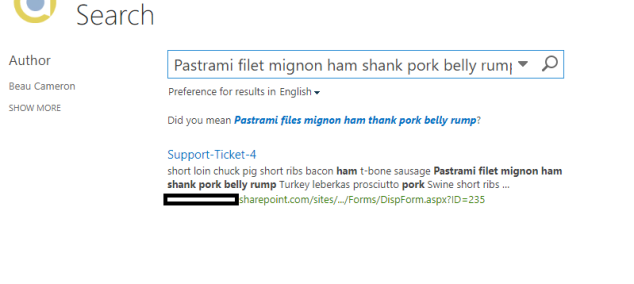
It should be no surprise that when I search for some of the description of the tickets, that they should return in search results as well. I’ve decided to search for the first sentence of the description in the mock up. Here is the result!

SearchResult2Does it work in Modern too?

In my previous examples I was using SharePoint Classic Search. If you were wondering if it works in Modern search as well, you bet!

modernsearchHow does it work?

My guess is that OCR in SharePoint is using Azure Media Services to convert text content in digital files into digital text. The reason for assuming this is because of the following naming convention used in SharePoint.

Whenever SharePoint finds text within your images, the values get stored on the item in a field called MediaServiceOCR. Take a look at the JSON response from querying for the list item.

MediaServiceOCR

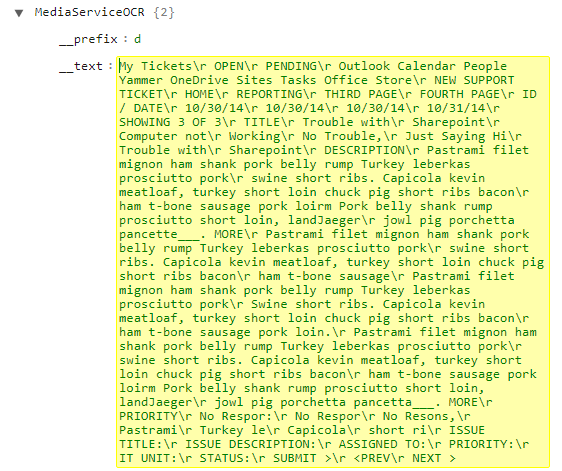
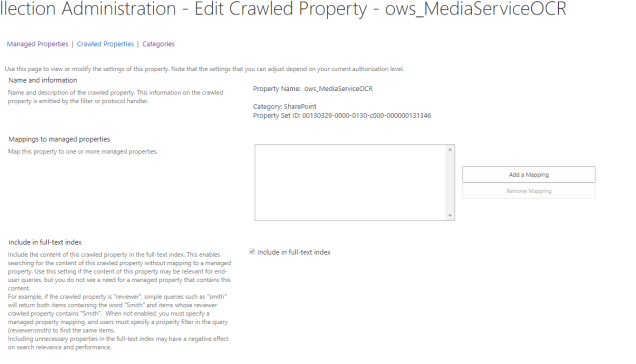
I wasn’t able to find a default managed property for this field but that isn’t a huge problem because SharePoint automatically creates a crawled property called ows_MediaServiceOCR. Using this crawled property, I can create whatever managed property mappings that I want.

Crawled.png


Some Comments

OCR PDFs have native support in Office 365. However, scanned documents which are PDFs currently aren’t generating values in the MediaServiceOCR column. I’ve been testing this functionality with no success — yet.

I have noticed some inconsistencies with the OCR functionality. I have tested this on multiple libraries and I have noticed it hasn’t been creating the MediaServiceOCR values on some items (doesn’t exist). I’ll keep you posted when I find more information about this.


Security Trimmed Hub Site Navigation Updates!

I had recently posted a blog  about a SharePoint Framework (SPFx) application customizer I built for use with hub sites in Office 365. The problem I currently have with Hub navigation is that all of the links are static links. This means, that whoever creates the common navigation must be cognizant of what links end users have access to. With that in mind, I built a new navigation the replaces the out-of-the-box hub site navigation elements with a security trimmed listing of sites within a Hub.

For brevity, this isn’t an all inclusive tutorial. It’s just discussing the high level changes to the original implementation of the application customizer.

How it works

The new navigation uses a combination of the SharePoint Search API and the new Hub sites API. When a user lands on a site collection that belongs with in a hub, I grab the hub site information to find all of the sites that exist within the hub using the Search API. The benefit of this, is that I can security trim a listing of sites with in the navigation. That means I can have sites in a hub that a user may not have access to, yet include them as elements in the global hub site navigation.

HubNavSite

What’s wrong with V1?

While this approach is great and I have had quite a bit of success building out security trimmed navigation, the default implementation lacks the ability to use the existing hub site navigation elements. This is why I have released v2 which is available on GitHub for download.

The new application customizer still implements the “Sites” listing node in the navigation.
NewNav

Adding existing Hub navigation

Version 2 is almost identical to version 1 with the exception that I am now pulling in the static elements from the default hub navigation. To do this, I’ve made some modifications to the base ReactHubsiteNavbarApplicationCustomizer.ts file, to set the Navigation property equal to the navigation array that returns from the _api/web/hubsitedata endpoint.

this._currentHubSiteData = await  searchService.getHubSiteData().then((hubData: IAssociatedSite) => {
if(hubData){
return searchService.getHubID(hubData).then((hub: IHubSiteData) => {
//add existing hub navigation
hub.Navigation = hubData.navigation;
return hub;
});
}
else{
return null;
}
});

Now that I have the elements as part of the _currentHubSiteData object, I just have to modify my HubNavBar.tsx component to accommodate loading the existing navigation nodes. One thing that isn’t working currently with the commandbar, is the ability to have a navigation element with children, in which the parent link is clickable.

SiteTrimmedMenuCode

You may notice the methods are almost identical. Rather than refactoring… I’ve separated them out because I have some future changes I’d like to make specifically to the rendering of the trimmed sites listing.

Ability to edit navigation

Now that we are showing the existing navigation elements and hiding the existing Hub navigation html…I needed a way to allow users to add and edit the original Hub navigation. There is an endpoint at _api/Navigation/SaveMenuState for saving changes to the menu, however it is undocumented by Microsoft so I will avoid using it for now. Instead, I am going to re-use the out-of-the-box Hub site navigation control to manage adding/editing elements.

To do this, I am checking if the user has ManageWeb permission, and then I will show an edit button which will show/hide the original Hub navigation.
//if user has manage web permissions, show edit button
const hasPermission:boolean = this.props.context.pageContext.web.permissions.hasPermission(SPPermission.manageWeb);


if(hasPermission){
commandBarItems.push({
key:"editButton",
name:"Edit",
itemType:ContextualMenuItemType.Header,
onClick:this._editOnClick,
className:"editButton",
href:"#"
});
}

Caveat: The out of the box permission for managing Hub navigation is the new “Edit” permission. Which means that users in the Member group have access to change the navigation. I think this is a bit too much permission, so I am restricting the permissions to “ManageWeb”.

The Result

hubnavnew

The end result is a combination of security trimmed sites listing within the hub and the existing hub site navigation. User’s with ManageWeb permissions on the Hub site will be able to see the edit button to modify the existing navigation elements.

Notes

Because of the caching in the customizer, it may take 15 minutes for changes to appear!

GitHub – https://github.com/bcameron1231/SharePoint-Framework/releases/tag/v2.0

Code is in pre-release and subject to change (refactoring).


Office 365 Hub sites Dos & Don’ts

Hub sites are out in targeted release and the masses are quickly jumping to PowerShell and creating hubs in their environments! While this is exciting news, there are many considerations you should be aware of when using Hub sites (hub sites are in preview and subject to change).  The DOs & Don’ts below are my opinion on how to use Hub sites.

Hub site basics:

  1. Hub sites roll up News, share a common theme and share common navigation
  2. Hub sites can be Modern or Classic Sites
  3. Hub sites can be Site Collections or Sub Sites
  4. Hub sites work with modern pages only
  5. Hub sites can be created via PowerShell & via REST


DOs

  • Plan before you create
    • Your tenant is limited to 50 hubs max (at this time). Be cognizant of this when planning any new Information Architecture around Hub sites.
    • Be aware Hub site functionality is best with modern pages, be aware of the current limitations when linking classic site collections. Classic pages will not share the navigation elements.
  • Create Hub sites out of Modern Communication sites & Office 365 Group sites
    • Modern sites will always give a consistent look and feel to your hub sites, because all of the pages are modern and will adhere to the navigation elements and theme defined in your hub
  • Use Hub sites as a way to connect team sites
    • Hub sites are a great way to roll up content from similar/connected teams. Use hub sites to share news!
  • Connect classic site collections into your hub
    • Hub sites support classic site collections. See “Plan before you create”.
    • Any sub sites within the associated site collection, which use modern pages will receive the common navigation and theme.
    • Modern theming is currently being released to classic sites (yay!)


DONTs

  • Do not individually link sub sites to Hub sites
    • This will become a maintenance nightmare. The reason being, sub sites can actually join a hub even when the parent site collection isn’t a part of the hub at all.
    • Navigation in the classic sense will become convoluted and lacks governance when switching between classic and modern, creating a poor end-user experience.
  • Add Navigation without being aware of the end-users
    • Hub site navigation is static navigation. Be aware that some end-users may or may not have access to the link you have provided.
    • With some customization, you can create security trimmed navigation. Follow my previous blog for more info.


I’m sure there are plenty more DOs and DON’Ts that I can add to this list. If you have any you’d love to add, comment and let me know!


So your hub site settings aren’t showing up in Office 365?

Hub sites have been released to Office 365 Targeted Release tenants. With all of the excitement, everyone has been jumping to powershell and adding hub sites to their tenancies!

Register-SPOHubSite https://mysite.sharepoint.com/sites/Hubsite

However, some have noticed that even though the powershell commands appear to be working, you may notice that your navigation is missing or the hub site settings are not appearing in the UI. The reason is simple, and thanks to @dmadelung for reminding me… you need to make sure that your release preferences in the Office 365 admin center are set to “Targeted release for everyone”.

ReleasePreference

If you’d like more tips and tricks on hub sites, head over to Marc Anderson’s post!

Thanks and happy hubbing!

Welcome to my new blog

Thanks for joining me! As some of you know, I’ve been blogging about SharePoint for many years at my company’s blog over at Aerie Consulting. I’ve decided it was time to start my own blog to share not only my experiences with SharePoint, but also share other things that I’m interested in. If you follow the Aerie blog, don’t worry, I’ll still be writing there as well!

I appreciate everyone who has followed my posts and my bombardment of tweets over the last couple years! It’s because of you and my love for sharing knowledge that I have set up this new blog. I hope you find it helpful and maybe, just maybe, you’ll come back! 🙂

I understand it will be an uphill battle starting from scratch, but I’m ready for it! (insert uphill picture below)

Uphill
Baldwin St, Dunedin NZ – steepest residential street in the world!