The SharePoint Starter Kit is an open source initiative that provides an end to end solution for provisioning pre-built sites, web parts, extensions, site designs and more in an Office 365 environment. If you’ve explored it’s functionality and are looking to see how you can configure and customize it yourself, today we’ll be talking about the Collab footer.
The Collab footer is the menu bar (highlighted in red) at the bottom this image.
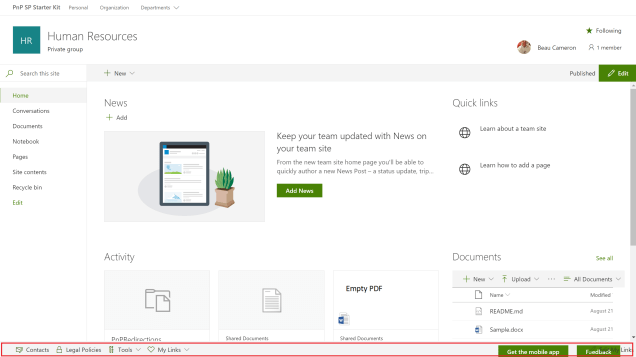
The Collab footer is a SharePoint Framework customizer that allows for showing a set of standardized links and supports personalized links for the current logged in user. You may be thinking this is very similar to the Portal footer. In fact, it is very similar in that it shares the same personal links. That means when a user configures a personal link on the Collab footer, it will automatically show up on the Portal footer in the hub site as well!
The personal links are stored in a property on the User Profile that needs to be created by an admin. Instructions to do so can be found on the GitHub repository at this page.
Here is what the Collab footer looks like when hovering over nested links.

Where are the links stored?
Unlike the Portal footer, where the links are stored in a SharePoint list… the links in the Collab Footer are stored in the Term store which gets automatically provisioned during the deployment of the Starter Kit.

How to modify the links in the Collab Footer
In order to modify the links in the footer, you’ll need to edit the properties on each term within the PnP-CollabFooter-SharedLinks term set. Let’s make a modification to the Legal Policies link. By default, it links to https://intranet.contoso.com/LegalPolicies and looks like this.

If you’d like to change the label for the link, just rename the term in the term set. Select the term and change the default label.

The link value is stored on the navigation property of the term in the term set. Click on the term and select Navigation from the tabbed menu.
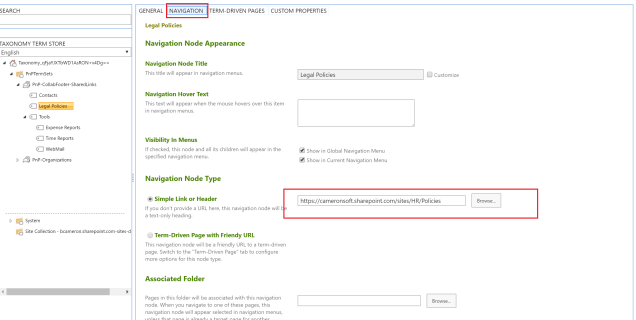
Let’s modify the default value to now link to a new library in our HR site that holds policy documents and click save.

Modify the link icon
If you are adding your own links or wish to change the icon of an existing link, it’s very simple. The icon’s used for the links are stored on custom properties on the term and references UI Fabric Icons.
Navigate to the UI Fabric Icons site and select an icon that suits your needs. Let’s modify the lock icon to be the “Documentation” icon instead of a padlock. Hover over the icon with your mouse, and copy the value underneath it.

To change the icon, navigate to the Term Store and select the term you wish to change. Select Custom Properties from the tabbed menu and you’ll find a custom property called PnP-CollabFooter-Icon. The default value for Legal Policies is “Lock”. This value is the icon class from UI Fabric.
Replace this value in the custom property of the term with the Fabric Icon we copied.

If we reload the Collab footer we will see the new icon!

My new icon isn’t working!
You may find when you update the Icon with a different one, that it doesn’t render and instead you see a square box instead.

The reason for this is the SharePoint Framework isn’t using the latest version of Office UI Fabric. Because of this, you’ll have to choose a new icon.
Customize a menu for each Team site
After deploying the Starter Kit, you will notice the Collab footer is identical on both the HR and the Marketing site (this is by design). In the real world, it might make sense for department sites to have their own footer. In my environment, I had deployed an IT site along side the HR and Marketing team sites.
Let’s create a new footer for the Information Technology team site. In order to do so, here are the list of things we’ll need to do.
- Create a new term set for the IT site
- Remove the current Collab footer
- Add Collab footer back with new clientsidecomponentproperties
Create new Term Set

Start by creating a new Term Set under the PnPTermSets group. We’ll call it “PnP-CollabFooter-ITLinks”. Create a couple terms, update their links in the Navigation menu and add the custom property for the icon from the Custom Properties menu.
Remove the current Collab footer.
In order to remove the existing Collab footer that was deployed from the Starter Kit, we’ll need to use PowerShell.
Connect-PnPOnline https://yoursite.sharepoint.com/sites/itsite
Remove-PnPCustomAction -Identity "CollabFooter"
Add updated Collab Footer
Now that we have removed the existing footer, we need up add the footer back and update the clientsidecomponentproperties before we do.
Clientsidecomponentproperties is a JSON object that defines a set of properties to be used by a SharePoint Framework component. Notice the property “sourceTermSet”.
Connect-PnPOnline https://yoursite.sharepoint.com/sites/itsite
Add-PnPCustomAction -Name "CollabFooter" -Title "CollabFooter" -ClientSideComponentId c0ab3b94-8609-40cf-861e-2a1759170b43 -Location "ClientSideExtension.ApplicationCustomizer" -ClientSideComponentProperties "{""sourceTermSet"":""PnP-CollabFooter-ITLinks"",""personalItemsStorageProperty"":""PnP-CollabFooter-MyLinks""}"
In the sourceTermSet value, I have set the value to the name of the new PnP-CollabFooter-ITLinks term set set we created earlier. Run this command and then navigate to your Information Technology site and see the new footer!

Final Thoughts
I hope you find this post helpful. The SharePoint Starter Kit is a great example of how to provision solutions into Office 365. It includes 17 different web parts and 7 application customizers which are free for you use to use and modify! If you have any questions or would like more information on this post, please comment and let me know!
Sharing is caring.
